In this article, you will learn How to use custom fonts in WordPress.
The success of any website depends on its contents. Users always like those websites, whose contents can be clearly visible. It manages and impacts the market value of any website so that the web designer is using a special font other than a basic and traditional.
Are you looking to add custom fonts in WordPress?
If yes, custom fonts are helpful for giving a freshen up your theme and give as separate look in the website. WordPress uses Google Fonts, Typekit, FontSquirrel. Custom Fonts feature allows you to easily upload a 3rd party unique font that appears on your blog or website in a few clicks.
So, let’s start with:
Custom fonts in WordPress website with few some easy steps
Before downloading the custom font, you have to decide which font you have to use.
Note: Sometimes, WordPress requires an additional plugin to customize the fonts. So, first, we have to install Use Any Font.
Step 1: Go to Plugins > Click on Add New > Install and activate Use Any Font. This is the plugin which allows you to upload and use a custom font on your website.
After installing and activating this plugin, you will be having an extra tab on the left bar named “Use Any Font”.

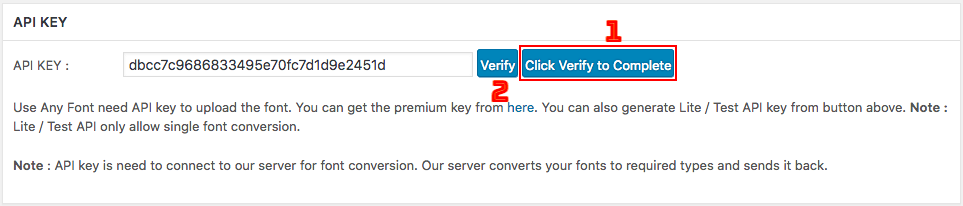
Step 2: Click on it(Use Any Font). This plugin needs an API key to work with your website. So, click on Test Generate API Key button and it will generate a key for you. After that click on Verify button next to it and it is ready to work.
Step3: Upload a custom font in your website so that the existing font style can be changed. So, click on Add Fonts button just below the API Key section as shown in the picture below.
Note: Before uploading a custom font, you must have downloaded that font on your computer in the format of .ttf from 3rd party fonts site like dafont.com, fonts.google.com etc.
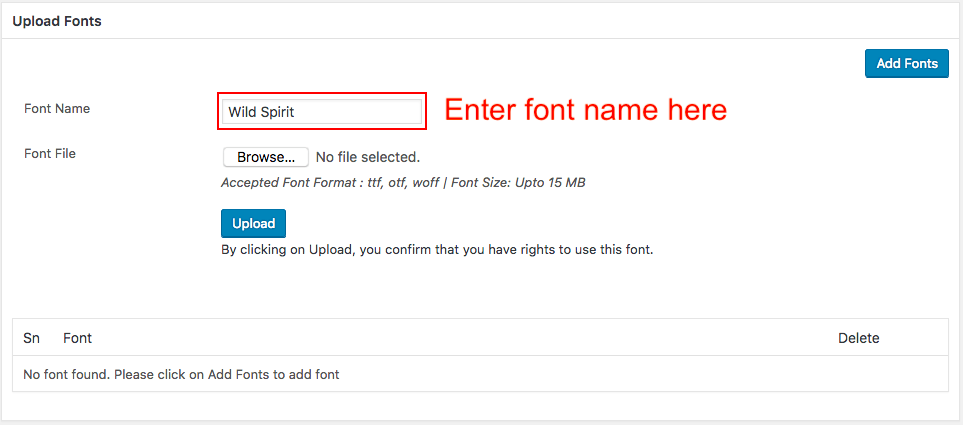
In the above picture, you need to type your Font Name and upload Font File (.ttf extension) and then after click on the Upload button.
Now, your custom font has been uploaded. It’s time to use that font. So, before that let’s make few more settings.
Step4: Now, you have to Assign Font or we can say that what are those areas on your website where this custom font can be used or applied. So, in the below picture, you can assign this font to your desired headings, body or paragraph.
 Select the check boxes as per your need. At last, click on Assign Font button and at the very bottom, hit Save settings. That’s it.
So, this was the actual method of how to use custom fonts in WordPress and if you need more help then please leave your comments below and I will reply within few hours.
If you are interested in watching a video tutorial, then here is a step by step explanation for you.
Conclusion: It is possible to use any custom font in your WordPress website by just downloading it from a 3rd party site and upload in your one. No matters, whether your theme have that font by default or not.
You might be interested in:
6 Steps to Speed Up WordPress Website
8 Important Plugins for WordPress Blog [Free]
How to Install WordPress Theme : Beginners Guide